First, a JK3D update – The small business I’ve started (https://jk3d.us) has been doing very well! I’ve sold close to 40 items to countries all over the world in just over a month. I believe the latest list of international locations I’ve shipped to is:
- Spain (2x)
- Netherlands
- France
- Germany
- UK (4x)
- Canada
- Mexico
- Italy
- Sweden
Not a bad world wide reach out of the gate! The biggest seller has been the Innovv camera lens protectors with sapphire crystal lenses. (These are the ONLY lens protectors on the market with Sapphire lenses!)
I’ve been reinvesting into more materials, tooling, and gear for the business with the income its generating. I am now starting to ramp up on SEO work, and expanding my product offerings and markets. I am also getting google business profiles setup, and working hard at getting a good base setup before I start pushing into certain markets. I’ve been continually updating the website/branding as I go as well.
Speaking of new markets – Burning things with lasers!
I’ve started helping some local businesses with laser engraved marketing products. I happen to have a 40W CO2 laser here that I use to do cutting and engraving on other products, so Why not use it for items I to help other businesses. This started with the making of custom rubber stamps and wooden nickels for a local small food cart.
The rubber stamp engraving was surprisingly easy, I found some quick settings to use off of a Youtube video and they worked out of the gate! I ordered some maple wood handles/blocks and engraved them as well. Only downside of the stamps is they are super ashy when they engrave and makes a mess in the laser cutter.
The wooden nickels were more of an event, because I had to not only build a workflow, but also the best method of aligning and making new orders easy to produce. I came up with an Inkskape template that I can use to align and engrave nickels fast and easy. With this setup I can do 24 in a batch and in general it is about 45 – 50 min for a full engrave of all of them, I could get them faster if I keep tuning the speed/power mix on the engraver.
I will be listing all the laser engraving services and prices here @ JK3D.us
Motorcycle Upgrades for 2021!
Tis the season! Spring is the time of the year we all dust off the bikes and look at all the different projects and things we want to do with the bike! Well for me that is no different. I had a bunch of lingering projects from last fall, most of which were driven from issues, or observations from riding the bike 2500mi+ in a couple weeks.
Upgraded Seat
I didn’t have a big issue with the stock seat on the bike, but found someone on FB selling a Front/Rear Yamaha comfort seat for the bike for $50! (The original price tag is close to $600 for both normally!) So I picked them up, and there was supposed to be a small hole in the main seat, but it turned out to be a small scrape and nothing more. It was an incredible deal. The new seat is firmer, but better contoured and should give a nice feel on longer rides.
Suspension – Stop the diving, remove the sag!
One key thing I knew I was in trouble with on this bike for heavy loaded up riding, was the suspension. The springs and stock suspension can handle me on my own just fine, even some gear just fine. But loaded up for long trips, I was beyond the max for keeping sag in the safe zone. This caused the bike to dive more on braking, and compress down too easily on bumps… This is likely what made the destruction of the oil pan so easy last fall. So I planned to upgrade to something setup for the task of carrying me around the country/Alaska.
Step 1- Find a suspension guy : This is harder than you would expect. Motorcycle shops/dealers are booked out weeks/months and generally they are not suspension specialists. Some suspension guys are good at baggers/cruisers, some are good at off road, some are good at just BMW suspension or Ducati… After a lot of work I found a highly regarded suspension shop/guy near Denver who runs a small operation. This is exactly the kind of business I want to work with.
Step2 – Figure out what suspension to get: I talked with Matt @ Sick O Sycles for a few days about options, objectives, and gave him a detailed load out of the motorcycle for trips (where weight is, how heavy it is, how heavy I am, etc… ) and in the end we came to the conclusion the best bet for this kind of riding/bike is Ohlins STX46 rear shock (YA537) and NIX30 front fork cartridges and springs. These are not cheap bits, but should be a “buy it once” situation.
Step 3 – Wait a month : Everything is backordered when it comes to high end suspension.
Step 4 – Get some golden Ohlins bits installed:
After a couple thousand dollars, and some handy work by my new suspension best friend, the bike is loaded up with some of the finest suspension available for this platform. The forks are extremely tunable with far better valving than the OEM stuff. The rear is a whole different level though. Remote reservoir and compression valving adjustment, rebound adjustment, and remote preload on the rear spring.
The Results? : Well its been rainy a bit since I picked it up, but on the ride home the bike was night/day different. Zero diving on braking, making the front brake far more functional and gives some amazing confidence on hard braking. The Front/Rear balance going over bumps, cracks, etc… was smooth but still gave a nice bit of road feedback (more of a whisper than a yell over the cracks in the road). I still need to get the bike loaded up and get suspension settings/sag set. That is happening this weekend.
More 3D printing for the motorcycle:
New suspension means the opportunity for new tools. I made and have sold a hand held preload/valving adjustment tool for the OEM forks in the past (the blue circle item in the pics) and after some feedback I updated the design to give better leverage (the black version).
The took I designed wont work for the new Ohlins fork tops, so I went and redesigned it to support the new suspension. This new suspension needs a 3mm hex to adjust the valving and I was not able to get that fidelity out of the FDM printer, so I went and designed the part to be printed with clear ABS-Like Resin. The Ohlins forks are harder to set preload on than the OEM so it is quite difficult to set it by hand, but not impossible. Fortunately preload isn’t a frequently needed adjustment on the road.
Camera Mounts for the motorcycle: I also have re-printed and updated the camera mounts on the bike as part of my work on JK3D and refining existing designs.
The Front and Rear camera mount are now simpler, and printed in 2 pieces instead of one (TPU separate), The Front mount is shorter and a slightly more simple print. The clamp is heavier duty. The rear mount cuts out a lot of unnecessary material, Increases the camera angle down to 3.5* to remove some of the rake of the rear rack, and also has a much heavier duty clamp. They both share the same TPU insert.
Also both are updated to incorporate the JK3D laser engraved branding. Both are/will be for sale for the Yamaha Tracer 900GT, and I am looking to get similar designs for the new Innovv K5 camera for the bike and expanding this mount to some other bikes.
Upgraded Turn Signals
One of the issues I ran into last fall, was when the bike broke down on the side of the road, running the hazards drained the battery in ~ 2 hours! The stock signal lights on the US edition Yamaha Tracer 900 GT are large standard lightbulbs. They are power hungry so flashing the hazards just drained the battery fast.
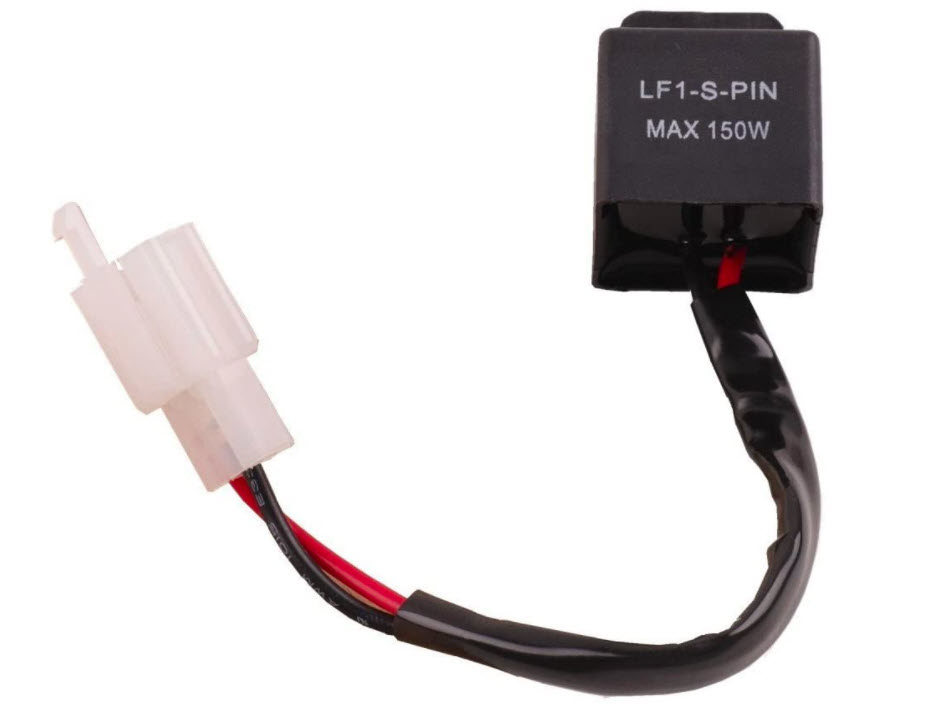
I went and did some research on Tracer900.net and other places and ended up ordering a set of LED turn signals, LED Flasher Relay, and some wire adapters. These are $20 for 4 turn signals, $10 relay, and $10 in connectors. So a pretty cheap upgrade all things considered.

Cheap flashers 
Cheap Relay 
Cheap connectors
The install was straight forward, with the connectors the LED signals plugged right into the harness connectors. I had to fabricate a wire run for the rear lights that tapped into the brake light signal. But besides that it was very easy.

Running Light Signals 
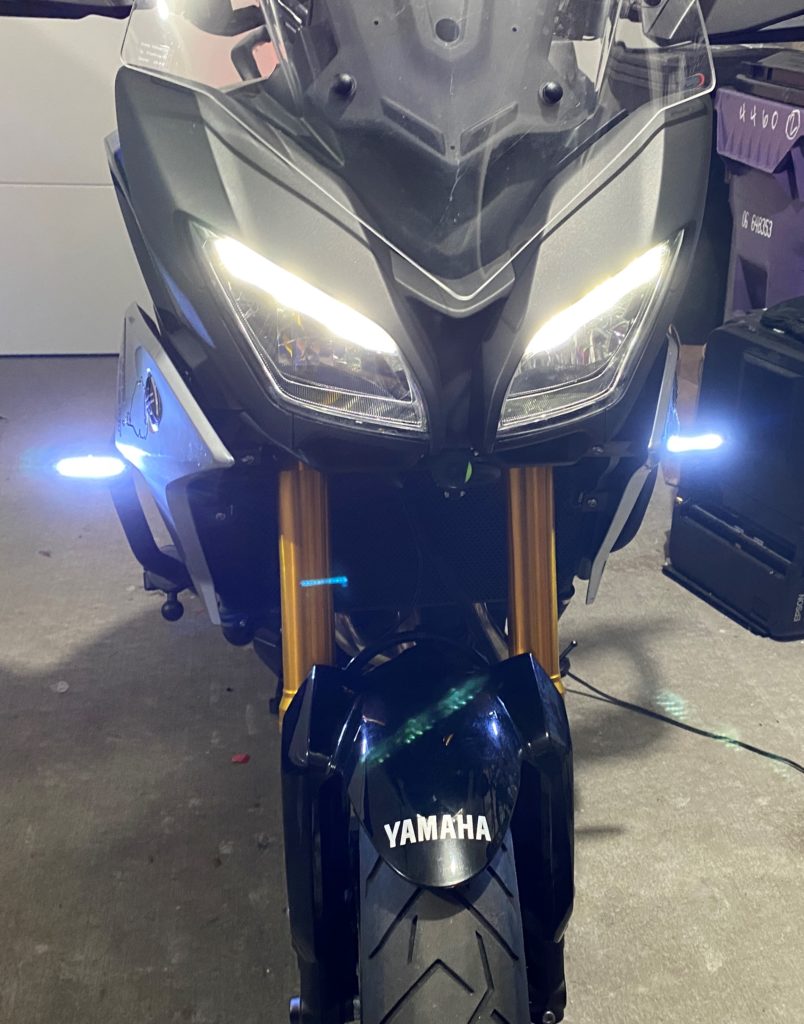
Front Signal 
Rear Signal 
Signal Brake Light
The LED signals have a few neat features, The front double as LED running lights, and when they signal they flow inside to out. The rear flow the same as the front, but they act as brake lights when not being used as signals.
Here is the rear Signals (in hazard mode so both are flowing), Front and rear both look like this.
And when the brake is activated.
For motorcycle specific upgrades that is about it for now. There is a recall on the front brake switch I am waiting on getting that addressed. Only outstanding items are by end of summer I may replace the chain with a better one as these OEM chains from this year are known to start falling apart around 4000mi of use.
What’s Next?
Besides all the fun above, I also am fully vaccinated from the COVID-19 fun, and I am ready to be released back into the wild! (Get vaccinated if you can! Even if you’ve already had COVID!) I am looking forward to at least a 4-5 day trip to cover some of New Mexico I missed last fall, and then a bigger week+ trip out to the Pacific North West, And Idaho/Montana this summer.
Alaska is not happening this year due to border closures and the Canadian COVID spread blocking recreational travel to AK from the Lower 48.
I have a number of other things in the works as well… just trying to keep busy!
Take care, Get Vaccinated, and keep the rubber on the road!


Paul Higgins
Hi Joe, greetings from Australia, are you still producing the fork adjusters, I am chasing a 17mm with 3mm hex valve.
Blog Admin
Hey Paul, I just found one I had in stock and its live on JK3D.us now.