
New Blog:
Welcome to one of the first new posts on this WordPress thingy. Not a big fan of it, but it’s better than Tumblr, I think. (All the other posts before this on this blog are imported from Tumblr and are kinda broken, the old Tumblr is still at jk720.net)
New Printer:
I’ve started down the path of designing my own 3D printer from scratch. I’ve been 3D printing for a couple years now and have continuously updated the printer I currently own.
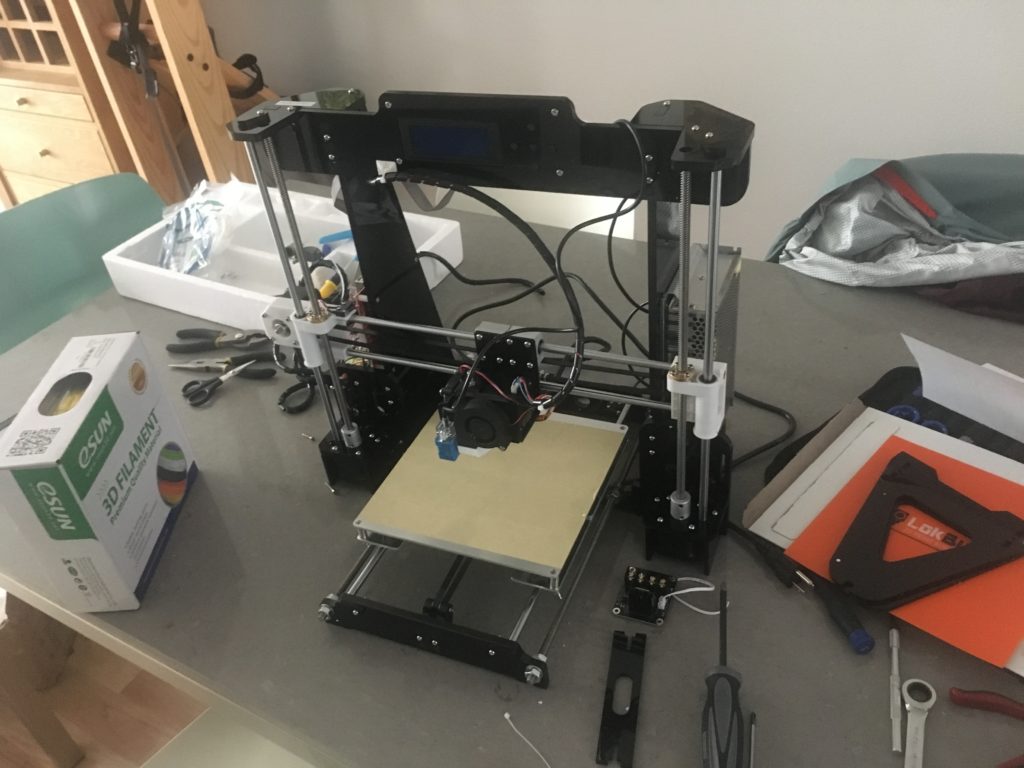
Then came one of the more challenging upgrades. Adding a new type of Extruder and Hot End
(e3d Titan Aero) , changing the mainboard (MKS GenL), New kind of firmware (Marlin), New Hot Bed (Anycubic Ultrabase), BLTouch Z-Endstop, TFT controller, and a custom designed X-Carriage for the Titan Aero on the Anet rails.

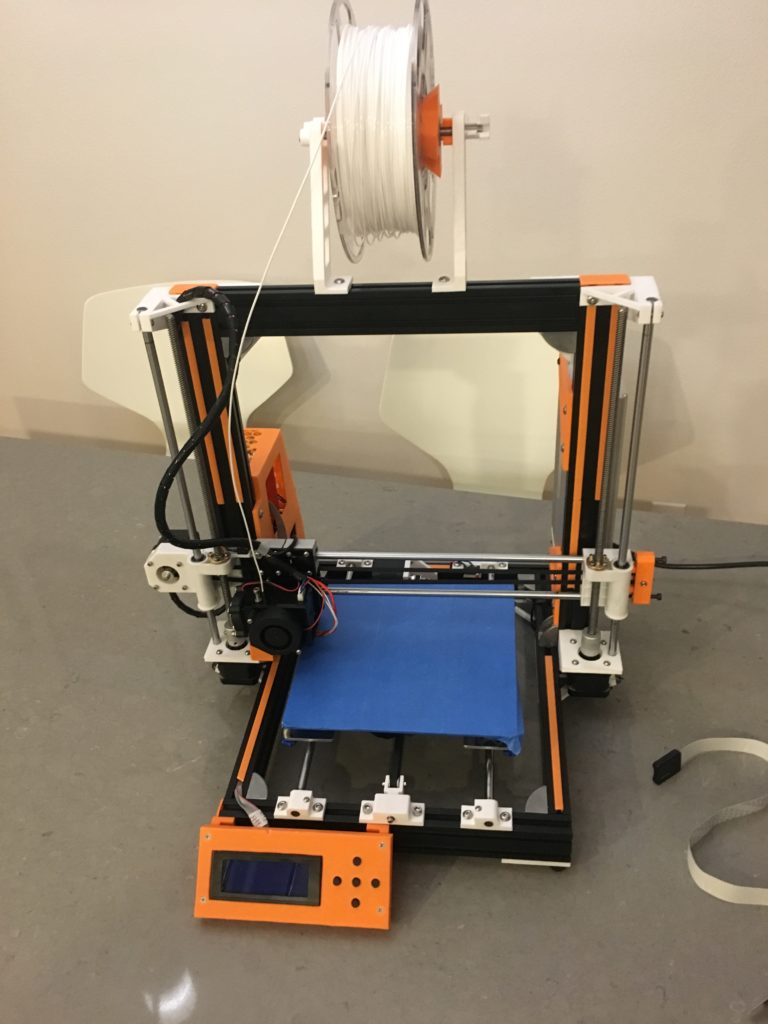
Full updated printer 
Titan Aero 
Custom X Carriage
In the upgrade cycle for the Anet, I’ve ended up with a stellar printer. I dipped my toes in the water of custom designing my own functional parts for the printer. I designed the X Axis Carriage and fan duct for it myself. Its posted on Thingiverse for others to use: The X-Carriage and a modular fan duct
The updated printer will let me print with high temp and abrasive industrial level filaments.
That work on the upgrades for the Anet really stirred my interest in designing my own printer from scratch. I ended up going down the rabbit hole of other designs, electronics limitations, linear motion controls, etc… to find a design that would work for me… and here is where we are today.
The Next Printer:
I’ve used some inspirations from other existing 3D printers out there to design one that doesn’t have as many compromises as the existing ones tend to have.
Current Compromises present in existing designs. I am not going to describe printer design in details, but you can look up these designs below to see how they work.
- HyperCube COREXY design – very fast, efficient use of electronics, but very delicate and essentially cannot use direct drive extruders making flexible filament iffy. Z Axis for the bed lowers part movement making tall objects easier to print. This uses a very clever belt and X/Y design to move light weight hot ends fast in the X/Y Planes. Natively a cube design for easy enclosure. Fast, Fragile, and limited in what you can print with.
- RepRap Mendel / Prusa Style – Y Axis for the bed moves the part being printed rapidly. Not an issue for smaller print volumes (220x220mm and lower), but taller objects start to exhibit banding or adhesion issues due to acceleration torque. Speed has to be kept in reason with stock 8mm smooth Z rods supporting the X-Axis Gantry. This is also a difficult printer style to enclose as it is not on its own a cube. This design can use heavy direct drive extruders without issue. This is the least expensive of the designs listed. Needing far less frame material. So Cheap, not fast, not enclosed and not easily scaled to handle dual direct drive extruders (AKA IDEX).
- Big Box/ BCN3D Sigmax Style – This is similar to CoreXY only not reliant on the clever belt design. It uses a dedicated X and Y motor moving just those axis (CoreXY mixes both). Many of these printers use a single Y Axis motor connected to a shaft to move both sides of the Y Gantry. This keeps stepper motor counts down and in line with the COREXY and Prusa printers. This does have a reliance on the Y Axis running through shafts, and multiple belts putting a high load on the Y axis motor, but that removes the chance of 2 motors getting out of sync. This printer can handle heavier direct drive extruders while keeping the Bed as the Z Axis. This keeps the perks of the Prusa print tool options, as well as the CoreXY motion dynamics for the printed object. This is also natively a cube design so it is easy to enclose. Flexible, Potentially complicated, scaleable.
- There are also SCARA and Delta printers, but I have zero interest in those designs at this time.
Joe’s 3D Printer Requirements
- Enable the X Axis to hold 2 independent direct drive extruders- IDEX (Heavy weight that would not be functional on a CoreXY to any speed, and difficult to work into a Prusa style printer.)
- Must be a Cube design for easy enclosure (also ruling out Prusa design)
- Must have the Bed be the Z Axis to reduce printed part movement
- Must be capable of movement speeds ~175mm/sec without impacting print quality to any great extent.
- X,Y,Z axis must be very rigid, to enable high speed and minimize banding
- Use quality belts and pulleys to further reduce banding and enable higher speeds.
- Use novel concepts to enable high temp printing in the enclosure without causing stepper motors to overheat
- Enable high speed printing (requiring a robust frame and solid linear motion system)
- Use the latest tech in motion control for 3D printers (ARM 32bit based controllers)
Beyond those concepts, it was pretty much open season.
After looking at these designs and my requirements I chose to go along the line of the BigBox/BCN3D printers but with some notable design changes and looking at what open source printers have done right and what people were struggling with. What I came up with was a printer based in some other printers, but wholly my own.
- Custom Modified Hybrid Big Box / Hypercube design:
- 2 independent Y Axis motors (vs the BigBox using a single Y with a shaft system). Using High Torque motors to hopefully reduce the chance of skipped steps.
- 2 X Axis motors for independent direct drive extruders (IDEX)
- Using HiWin designed linear rails (15mm for Y, and 12mm for X) for the X and Y motion system.
- 3060 Aluminum extrusion for the entire frame. (BigBox was based in plywood and acrylic for its frame, HyperCube others use 2020/2040 Aluminum for the most part, and Makerbot and others use a mix of plastic and metal frames.) This needs to be robust for the speeds I want to print at.
- Using a Hypercube Evo based Z Axis with 4x 12mm rods holding a build platform. With dual Z Axis screws to control height. (Big Box and others use/used a cantilevered Z Axis setup that doesn’t work especially well with heavier and larger build platforms. Causing Z Banding and deflection). For the Z Axis deflections of .1mm is enough to cause adhesion issues and deformation of the print.
- 330x330x380 build volume, actual usable will be 310x310x380 initially.
- Complete coverage of the build volume by both extruders.
- 110v 300 – 800w Heated bed. There are 1100w options I may consider down the road, but I am unsure I have a circuit where I want to put the printer that can support that kind of draw.
- Placing the Y Axis and Z Axis motors in direct contact with the 3060 frame rails as heatsinks (with thermal pads between them). The motors shouldn’t get too warm normally, but if the enclosure is sealed and high temp prints are going on for dozens of hours, it could cause them to overheat normally. Giving them the mass of the frame as a heatsink is easy and convenient. This requires unique motor mounts to be designed.
- Hall Effect end stops for both Extruders on the X Axis, and the Y Axis. Higher consistency and accuracy than the mechanical ones, and since they are non-contact there shouldn’t be any aging or changes with temperature. (aiming for ~.01mm resolution)
- Speed speed speed. The general limitation for IDEX printers is the weight of the X and Y Axis. The Y Axis in this case needs to accelerate and control the weight of 4 stepper motors and associated hardware. So for this instance I am using 9mm belts (Authentic Gates GT2 belts and pulleys), and high torque Y Axis motors. The X Axis will use smaller but high power steppers moving one extruder each. The Y Axis will ride on large 15mm linear rails to give a highly rigid and smooth motion in that direction. The X Axis will ride on a smaller 12mm rail, with long sized linear “shuttles” for each extruder. The 12mm rail is being supported and reinforced with a 2020 extrusion above it. This should limit the twisting motion due to the load moment of the extruders hanging below on rapid Y Axis movements. Based on other printers and reported speeds, this printer should be able to near 175 -200mm/sec of travel movements without seriously impacting print speeds.
- Custom designed Y Axis carriers, Y Axis motor mounts that also act as precision spacers for the Y Rails and Bed rod mounts. Every single printed part on the printer is being custom designed from scratch or open source parts being modified in some way for this printer design. Either for strength, function, or geometry changes.
- Positional accuracy if 5um for X and Y axis, this requires .9Deg/step motors. (not relying on crazy high microstepping in the controllers for more torque and accuracy). Using a 6 and 9mm belt setup with 16T pulleys (and 20T idlers to reduce belt wear a bit and smooth out the driveline.)
So … if this my preferred design that covers a number of compromises of other designs… why isnt this already out there? Cost.
Cost:
- Beyond cheap electronics: This design requires 8x stepper motors. (2X, 2Y, 2Z, 2 Extruders). Now you can double up on the Z steppers on a single driver normally, but for speed you can’t do that easily on the Y . So minimum here would be 7 Stepper drivers. This immediately makes using any of the current and latest 8 bit controllers (MKS Gen L for example) out of the picture. Not only do they lack the driver counts, but they lack the processing power to calculate that many steps per second (they barely can handle most current slow printers! The chip controlling them was state of the art in 1986)
- The new hotness: So besides buying 8x stepper motors (ranging from $20 X Axis – $45 Z Axis with integrated ACME screw, the Y Axis are high torque and in the $30 range). But now you need to buy a 32bit ARM based controller that can be expanded past the standard 5 or 6 drivers. This leads to only one real option – the Duet3D Duet 2 Wifi/Ethernet + Duex 2/5 expansion. That takes the price from a $60-$75 8 bit controller W/ drivers, to a $180 Controller + a $110 Duex expansion board. The Duet Controller is a different league from the 8 bit controllers in virtually every way.
- That hotness comes at a cost: So the electronics are a magnitude more expensive. And on their own more expensive than a cheap complete Prusa clone printer (Anet, Geetech, etc…). I currently print on a highly modified Anet A8 that cost me $200 new (probably a $600 printer now with all the work done to it).
- The trickle down effect of that hotness: The Motors being .9Deg steppers also require a 24v PSU for the setup due to the EMF feedback properties of small step motors in high speed implementations.
- Its Big: Another aspect of cost, is the size of this machine. It will require a large amount of extruded aluminum, and 3060 extrusion is 50%+ more expensive than 2040 series. Coming in around $400 in materials and weighing close to 40# in just aluminum.
- The running total: Overall this printer should cost in the range of $1000 – 1300 (since I already own one e3d Titan Aero extruder I will move over to the new printer when its done, otherwise add another ~$150 to the price.).
- But its ‘cheap’ if you consider:
Compare this with printers like the BCN3D Sigmax Priced around $6000 USD with a different but comparable overall build volume. A Makerbot Method at close to $7000 with similar volume and specs, and others that easily top $5000 for similar. In the end this is going to be a relatively cheap, very high end printer. That I also get to learn a lot on the way while I design and build it, and that is truly the goal.
The real reason and goal here:
Expanding my skills, and building something myself from scratch. Going from Idea, Research, Concept, Design, and Building all in one fluid process using multiple disciplines.
This project is requiring me to improve my skills in mechanical engineering, CAD design, material selection, electrical engineering, coding, motion control designs, electronics theory, and problem solving. I’ve spent months reading, researching, and learning on my current printer to know what I want.
This hobby is a crazy rabbit hole down which more rabbit holes appear. 3D printing is pretty much all aspects of STEM in one hobby and that is awesome.
Next Steps: I will be posting more as I get into the build and finalize the design. I’ve been doing all the design work in FreeCAD and Fusion 360. (Mostly in FreeCAD as I know that software better, Fusion just for some of the other tools it offers.) Most of the parts have all been ordered and with some lead time on some of the orders, I should get started building in March. I will start printing the first test parts in a week or so.