
Back Printing:
Using the MatterHackers NylonX, which is a Nylon 12 based Carbon Fiber loaded filament. This is in contrast to the nondescript but rumored Nylon 6 used in CarbonX. Nylon 12 is a bit lower friction, smoother, and has a 10C lower melting point or so than 6, but is equally as tough. I’d say its a bit more flexible than the CarbonX in thin prints, but given the variance in CarbonX material… who knows what it really is supposed to be like. Compared to the last spool of CarbonX I had (which was brittle, and shatter prone, and extremely abrasive) this stuff is like silk.
I’ve been pretty happy with the fine details I can get with the NylonX, and its density is actually a bit lighter than the carbonX, making it perfect for printing objects I want low moving mass with. I may re-print the X Carriages themselves from this material.
I haven’t just been printing with the CF Nylon filaments. I switched back to PETG to print a number of mounting parts for the printer acrylic. And then switched to eSun eTPU to print some parts you will see in the next section. I am impressed at how well all this material prints with the e3d .4mm NozzleX – the hardened steel/coated high temp nozzle. I havent had to change temps or specs for the print to use it vs Brass. This Nozzle will probably stay on one of the extruders on the new printer indefinitely.
X-Carriage Wiring:
So one of the bigger wiring challenges I have been facing is figuring out a way to wire both X-Axis extruders/Hot ends and keep the wiring flexible, out of the way, and durable.
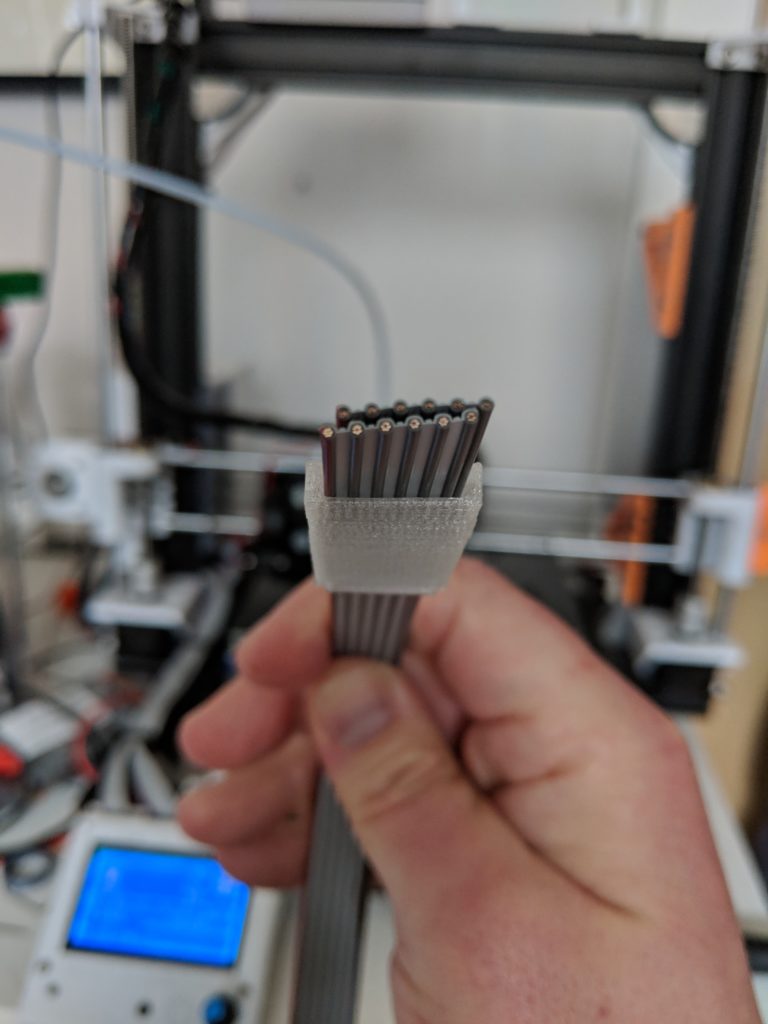
I ended up going with 2x 6 conductor 22AWG 3M Ribbon cable. (Digikey link here). I went with this specific cable because the spacing between the conductors give it some good strength, and I could layer 2 of them easily. Its not the most flexible cable on earth, but with its tall arch it should be fine for this… if not… I’ll replace it with something else. An alternative ribbon I have looked at is this one, which appears to be more flexible, heavier, and higher power capacity (18AWG, 34 strands vs 7, etc..). But it costs 2x as much.
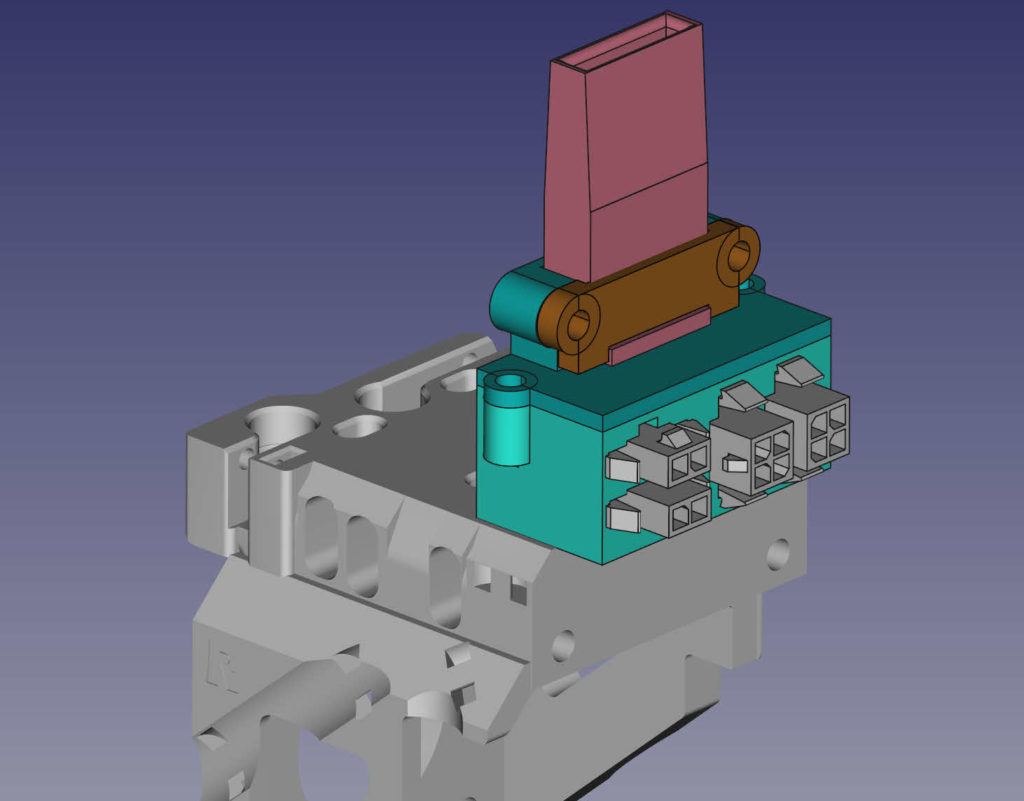
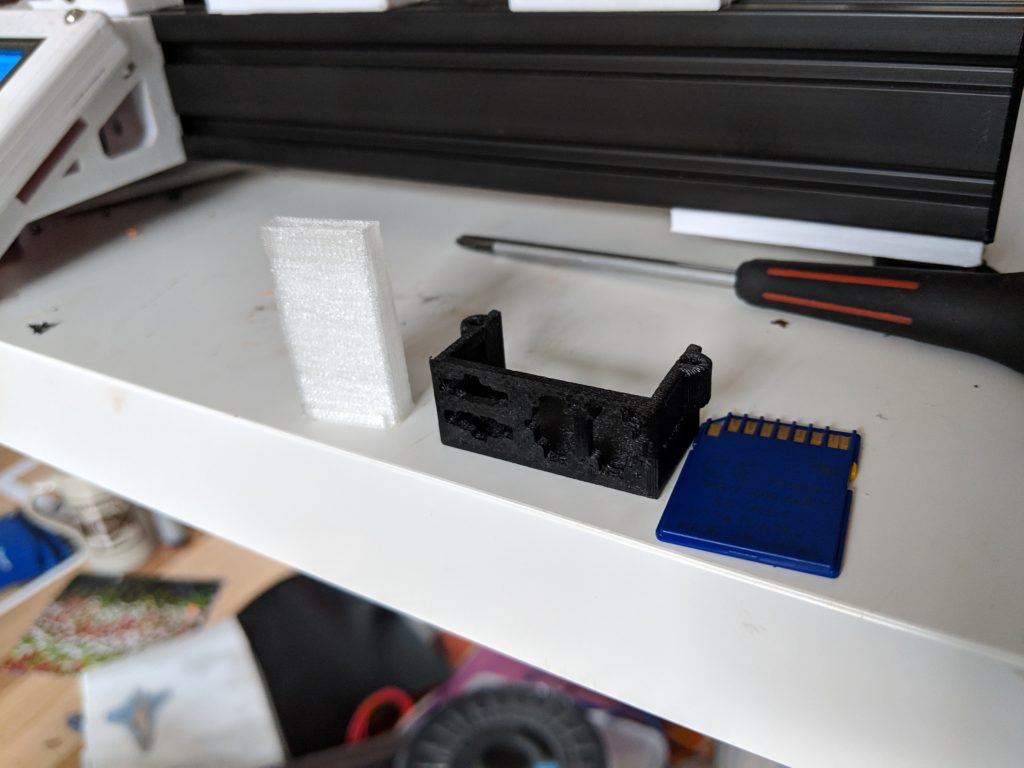
As you can see in the CAD image above, I am printing a small box that attaches to the X-Carrier (slightly modified ones between the extruders), that has a tall TPU wire stress sleeve, a clamp, and then feeds the ribbons to a set of Molex Microfit 3.0 connectors (similar to what e3D uses for their Thermistors and heater cartridges). This will make the hot end components interchangeable easily. The 12 conductors to each hot end will be divided up as:
- 4x Extruder stepper
- 2x Part Cooler fan
- 2x Hot End Fan
- 2x thermistor/PT100
- 2x Heater Cartridge
I did some checking on the amp limits for 22AWG and they should be far more than enough to handle the 30W cartridge at 24v. It comes to ~ 1.25A, when 22AWG can generally handle 7A at the max with high wire heating. From basic electrical maths, the wire may warm a bit but should only be .6 watts of heating across the entire 6ft run of the heater cartridge. I will be watching it pretty closely though. Should be interesting seeing the potential voltage drop as well. Worst case is I run a separate pair of 18-20Ga wire. Running the cartridge at 24v actually makes this easier as the current demand is lower due to the higher voltage. (it would be 2.5 amp for 12V)
For the X Hot end that will have the BL Touch, it will be fed by its own 5 conductor cable that will run alongside the ribbon.
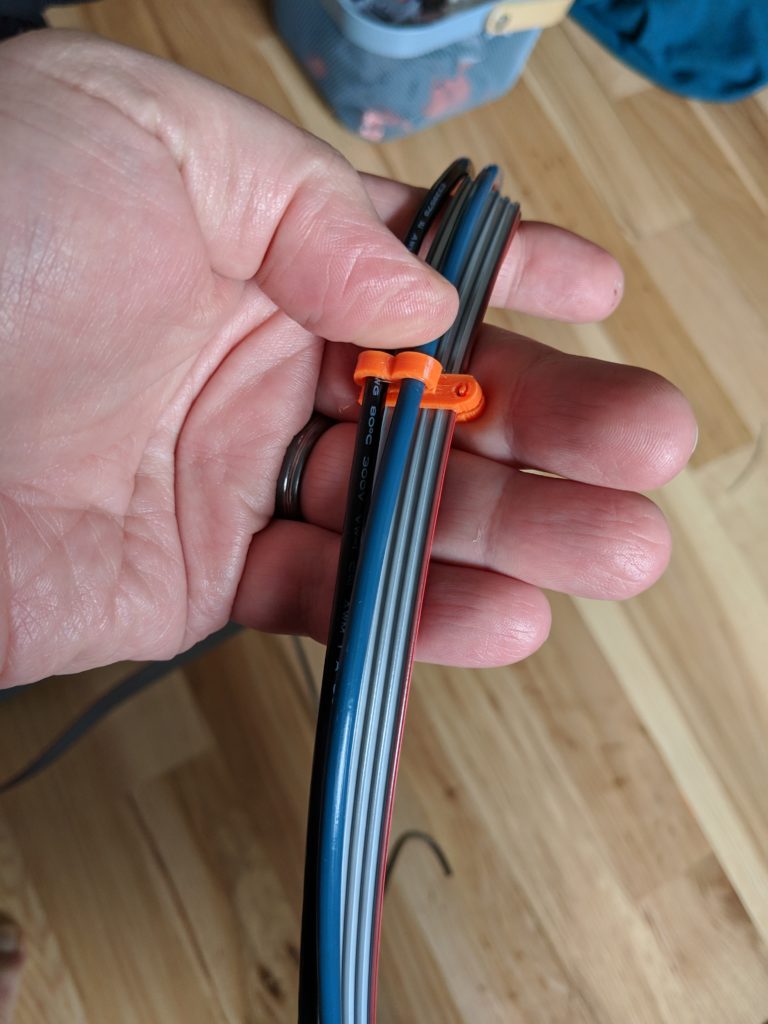
The above pic you can see the arrangement that will be done for the wire. The bowden will actually act as a bit of a spine for the wire giving it some form and strength to keep its shape. Both sides will have the Capricorn Bowden tube run over them. only one side will have the BL Touch though. The Bowden tube isnt going to be fed from an extruder, it’s going to just guide the filament from the dryboxes I am installing inside the printer to the extruders on the X Axis.
Power In Box for the printer:
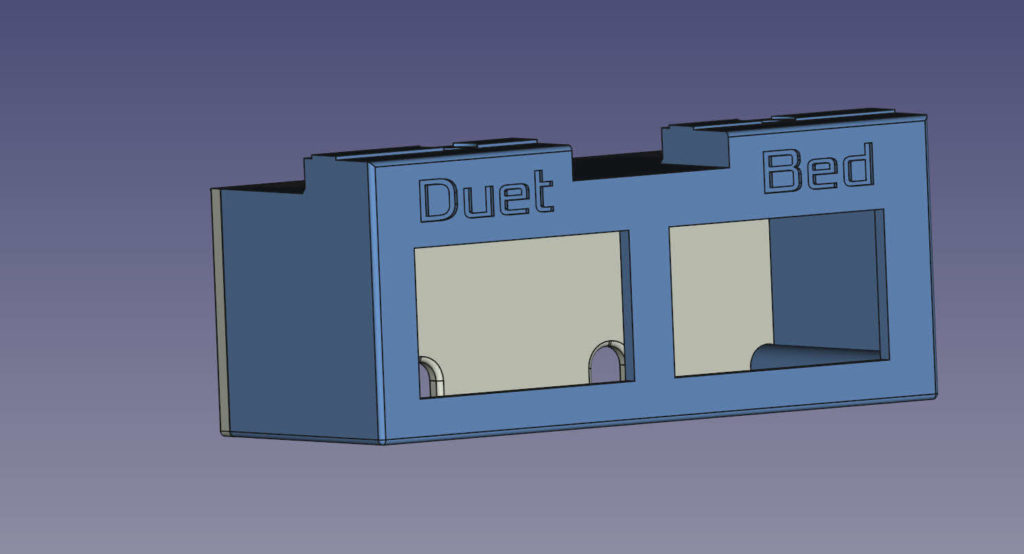
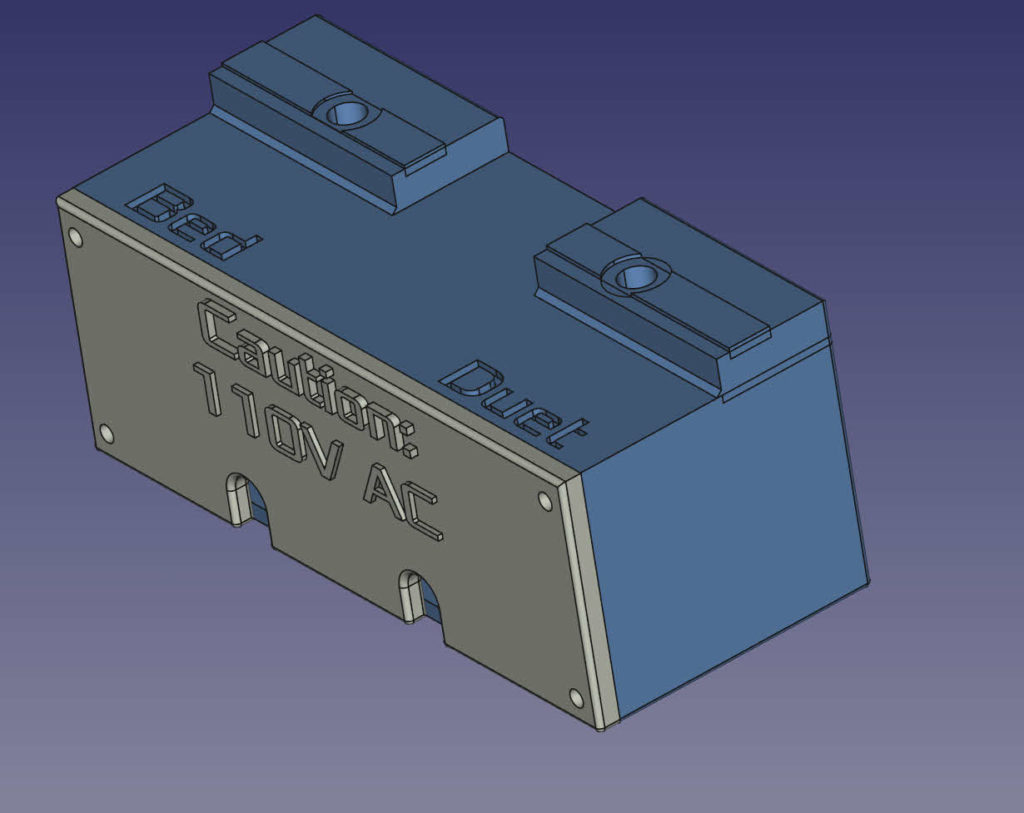
I designed a nice power junction box for the printer that will have 2 independent power switches and plugs. One for the bed, and one for the rest of the system (just called Duet in this case). Its spaced so that it will mount under one fo the Z-Axis 12mm rod mounts to keep it out of the way.
I am adding another hole to the back of the case to run a dedicated ground wire to the frame. I am running a dedicated ground for the frame itself, and a grounding wire to the aluminum plate for the heated bed.
Printing all of this in NylonX, mainly because I am almost out of orange PETG. Or I may print the back in PETG for fun.
General wiring on the printer:
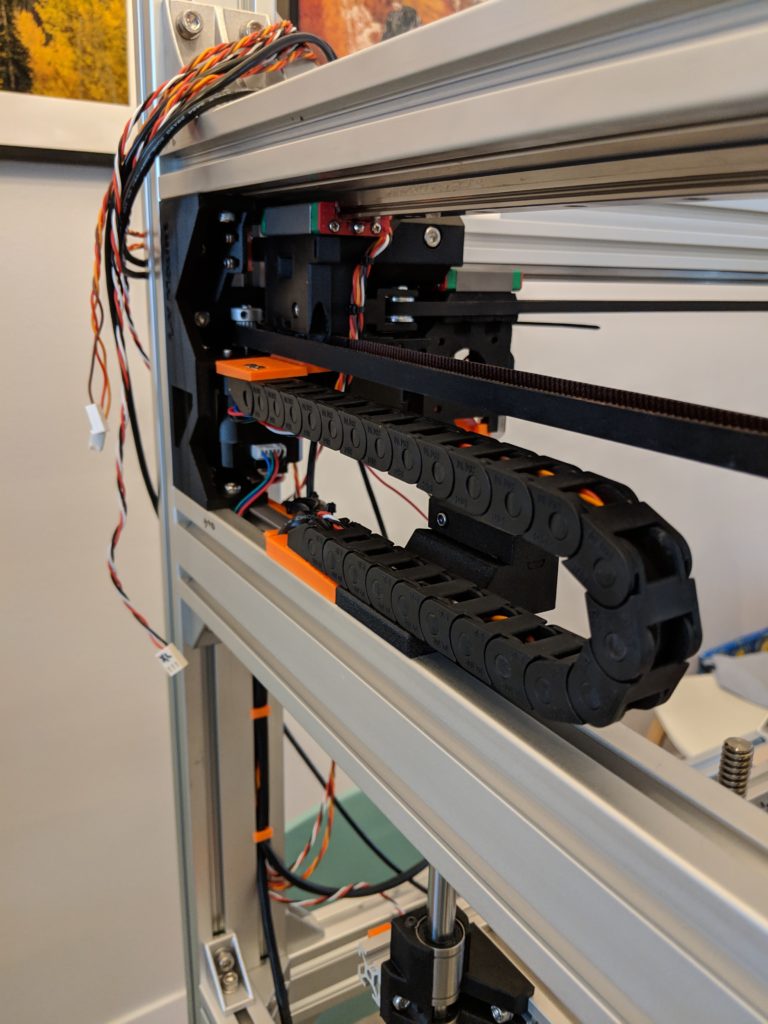
I finished up the wiring and tweaks to the Y Axis over the weekend. I printed the orange blocks that the drag chain anchors to so they have an angle to them. This helps compensate for the situation where many drag chains of this size have a natural arc to them and dont lie completely flat. I have another set of them that do lay flat, but they have a lot of resistance. I would rather have a free moving chain than one that sits perfectly flat.
Both sides are done, and I am just waiting to get the Acrylic installed and electronics in their permanent home then I will finalize the rest of the wiring for them.
Heated Bed:
No pics, but I ordered all the hardware I should need to get the heated bed wrapped up. I need to get to a drill press to prepare the tooling plate I have for use. I have a bunch of holes I need drilled into it… Looking for a drill press currently.