I am finally checking off more and more boxes on the printer from the project that kinda stalled last summer. One of which was getting the enclosure finished… which is a bigger task than I may have realized.
Doors
First up was to get the doors done, since I have the polycarbonate sheet for it already from last year, but never got around to figuring out how I wanted to mount it. This was a single 23×24.5″ sheet of .187″ thick Poly. I was originally just going to do one door on the front but realized french style doors would make more sense.
So I cut the poly with a Rotozip using a long straight edge as a bar to run the rotary tool against to give a near perfect smooth edge.
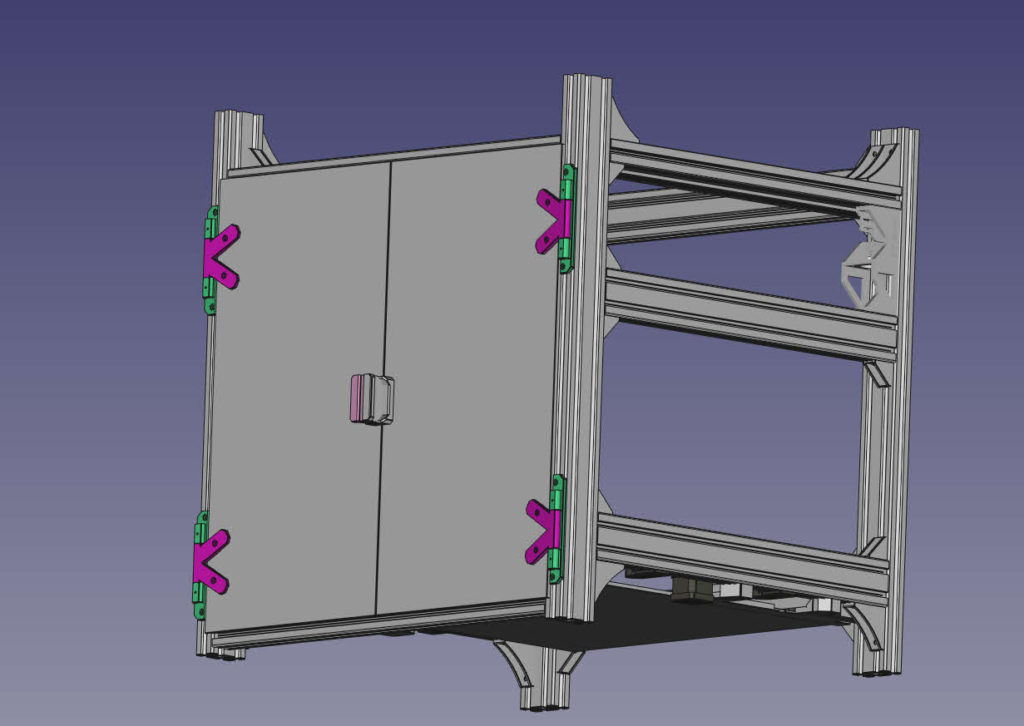
In FreeCad I started drafting up some design ideas for the hinges to keep clearance of the door material, and the foam seal tape I want to put around the interface.
Originally when it was one big door I was going to have 2 sets of 2 hinges on one side. When I went to split/french doors I changed it to 2 seperate hinges. The brackets on the door are angled into the door, it was a nice effect I thought. The handle itself also has a small spot for a 9mm magnet in it so the handles want to stay near one another to help keep the doors closed.
The final design worked awesome. Under 1mm deviation from what my cad drawings assumed. I am printing up some more magnet holders to give a bit more of a solid closure on top and bottom, but it works very very well as is. I used some 1/8″ brass rod for the hinge pins. All the parts were printed with eSun Nylon filament I’ve had kicking around for almost 3 years. I dried it out a bit, split the spool onto two so I could print 2 parts at once, and went to town. Really this material is awesome to print with, Nylon is by far one of my favorite filaments at this point.
I am going to start playing with PC filament and PC-CF filaments soon.
Sensors / Tie into Home Automation
Since I got the printer I wanted more ways to control it via our home automation setup. I already have the power for it controlled via a Leviton Zwave switch, but I wanted text alerts when the printer pauses for some reason, and also monitor humidity and temperatures in various parts of the machine.
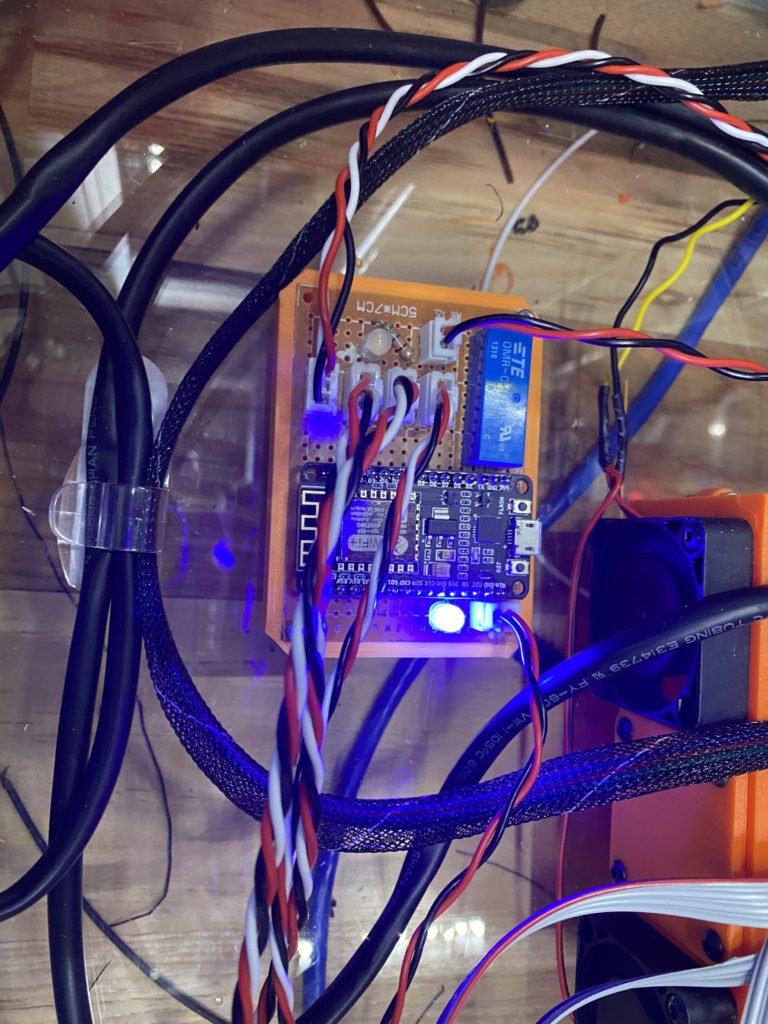
Enter Hubduino (Github link) A neat config for an Arduino/ESP to integrate it into a Hubitat/SmartThings environment. I purchased a $6 NodeMCU ESP8266 board, a reed relay, and used some connectors I already had a surplus of to make a small unit that will trigger a contact sensor on a pause being caused on the printer, and track 4 seperate DHT22/11 temp sensors. All those sensors watch Humidity and Temp.
Once I verified everything worked as planned, I finalized the wiring work, added some LEDs (one LED to show when the printer pause is closing the relay, and the other just a power LED). I also printed up a quick and dirty mount for it.

I ran the temp sensors in this way:
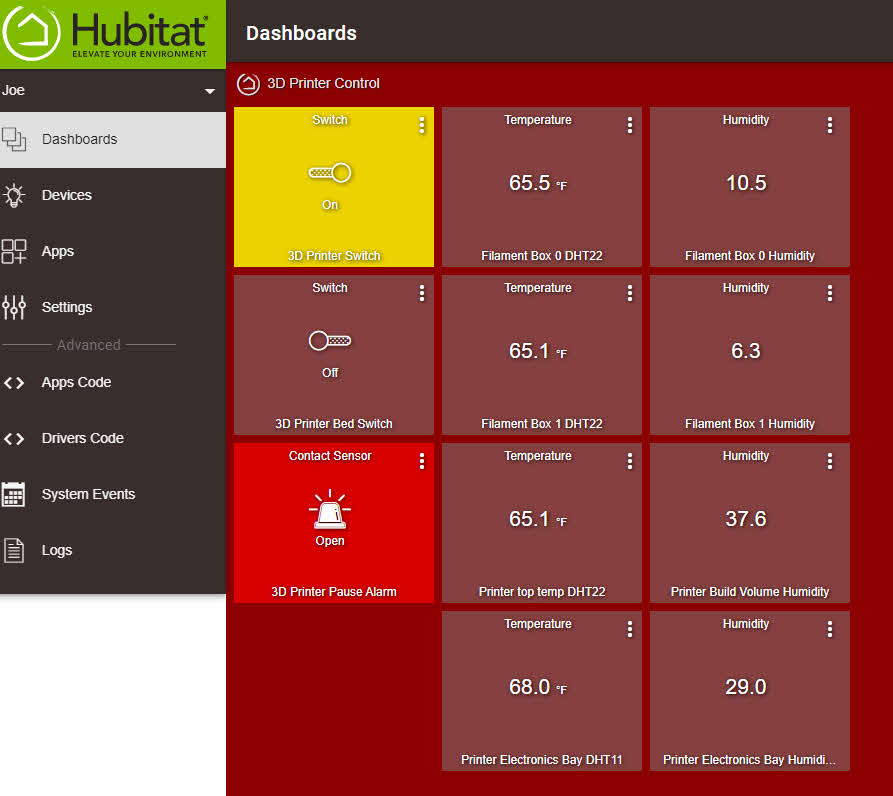
In Hubitat I now see this as a dashboard for my 3D printer:

One thing that is telling is just how well the filament containment boxes/dry boxes keep the filament when the descant packs are refreshed (baked). Its also interesting to see how warm the area the electronics live in can get. Its always elevated over the ambient even with a pretty good amount of air flow down there.
Rest of the enclosure
The next step here is to finish the top enclosure. That means ordering more materials and poly carbonate sheet. So there is a lead time there and I am going to take a month to probably do it. I am also working on building a small table for the printer to sit on and be at a more reasonable height.
As part of this I am drafting up a high fidelity model of the printer in FreeCad , to have it exactly as the real printer is.

So far so good and I am going to model the top part of the enclosure on this model I am working off of.
So for now…


Leave a Reply