It’s been a couple week or so since I posted about the 3D printer. This is due to other projects and work getting in the way. But also because work on the printer in general is tapering off as its getting very close to being done.
Wrapping it up:
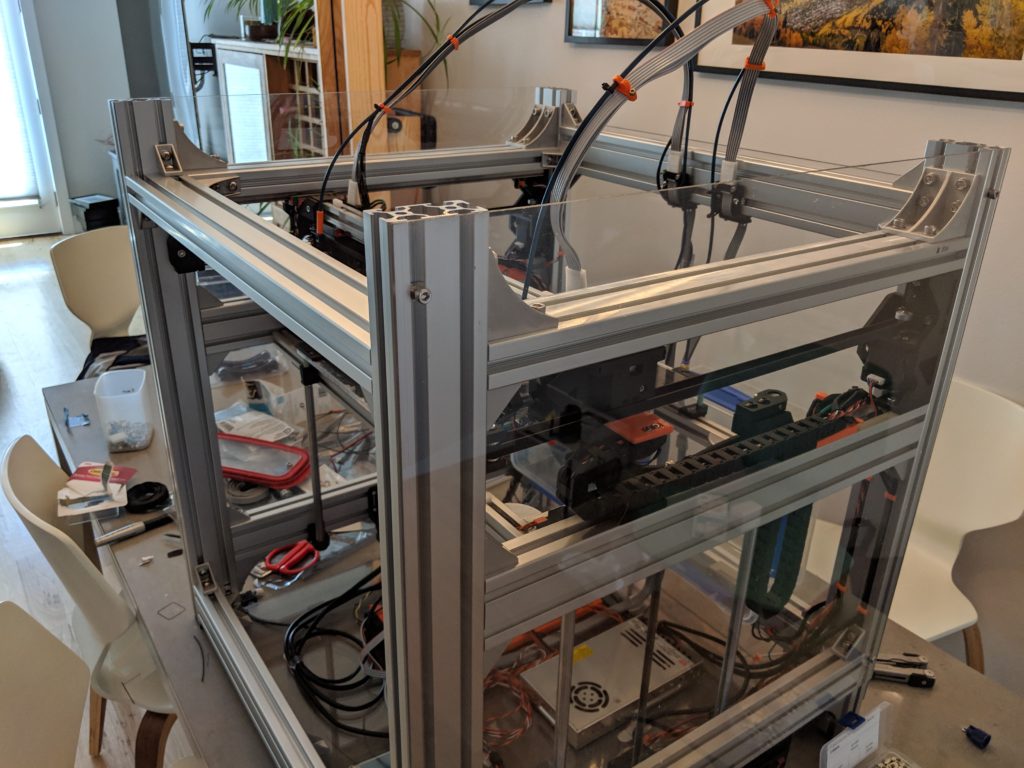
I had 6 pieces of polycarbonate cut for this project from a local plastics place. Turns out that stuff isnt cheap. The back plate, and the plate that the wiring/electronics mounts to is 1/4″ thick for rigidity. The back plate is that thick because it will also support the spools/dry boxes. The sides are 1/8th” since they don’t need much strength. There is a door that isnt on it yet, and a top plate that goes over the electronics I just need to mount.
Polycarbonate that is 1/4″ thick also carries some significant weight with it. The printer at this point is well in excess of 100lbs with all the plastic cladding on it.
The top will be sealed in down the road, I am going to build a light (2020 extrusions, and 1/8″ poly) hinged top that will clear the extruder cables but allow the machine to be completely sealed. I will be printing some parts for the lower areas to seal in around the motors and the top electronics plate.
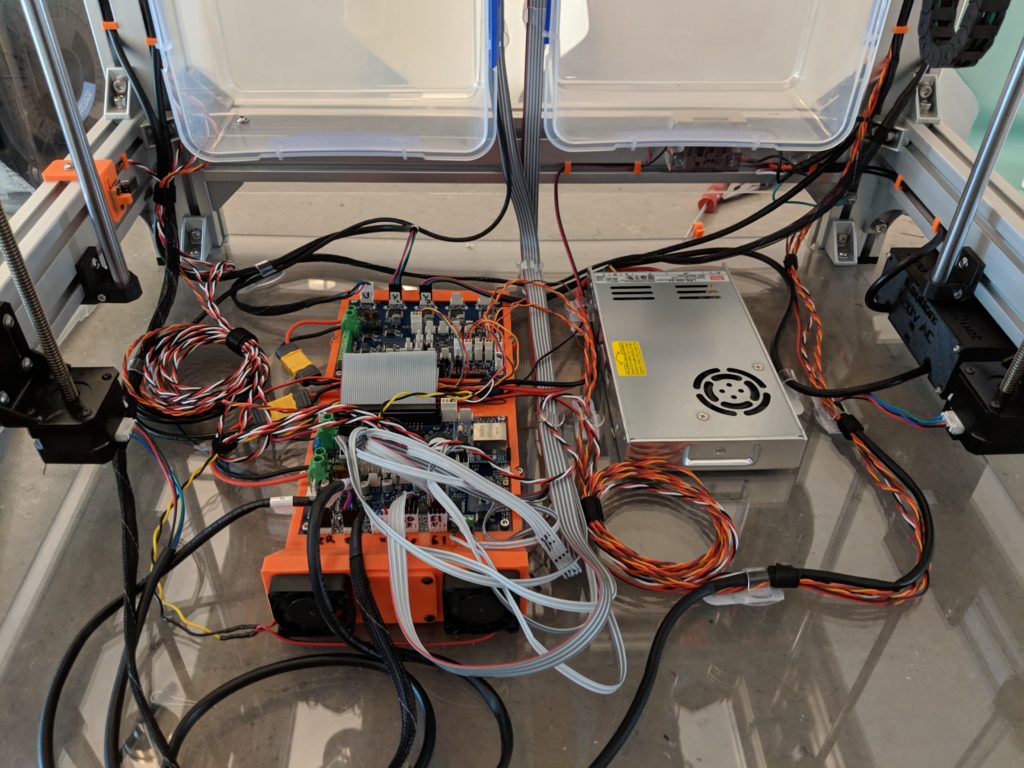
Final wiring:

With the dry boxes installed and the electronics in their final resting place on the 1/4″ PC plate, I cleaned up the wiring that I could, and put everything in a place and way that this should be the final layout of the wiring. The 4x ribbon cables from the extruders merge up under the dry boxes into one thick wire bundle. I used the 3M control clips to hold everything in place.
I was pretty happy that everything worked when it was all plugged back in, I kind of expected some drama around that.
Next steps: Calibration

Nailed it a few tries later 
First try
Up until this point I’ve been printing with one or the other extruder (both have been used quite heavily so far), but I haven’t done any multi colored or any print that uses both extruders. Calibrating an IDEX printer can be daunting, and it brought out a bunch of messed up settings and offsets I had in the machine configuration.
I found the offset from the Z Probe was off for both extruders, the X and Y positions were also suspect. That didn’t matter printing with just one, but when trying to get both to print in the same place at the same height… that didn’t work.
Now that I have the printer calibrated to a point I am happy to try printing multi colored objects or soluble supports, Simplify 3D is the hurdle I need to deal with.
Simplify3D and IDEX – Coding fun times
I use Simplify3D for all my slicing needs. And it has a lot of features and functionality that are awesome. But one thing I am finding that it lacks is native/out of the box support for IDEX setups without some coding for tool changes and such.
Problems I ran into so far: If you have a prime pillar, S3D forgets to heat up the tool you are changing to and waiting for it to come to temp before doing the pilar. If you skip the prime pillar, its good to go and the code to heat up happens in the right order. This is clearly a sequencing bug in S3D.
Coding and variables you can pass in the scripts page are barely documented, I am currently researching what variables I can use… and what does not exist. I want to write tool change scripts with logic to take the temps I define for the HE tool and use those per layer/tool change and not need to hard code those variables in.
I found one thread on their forum that explains a bit of the coding you can do:
https://forum.simplify3d.com/viewtopic.php?f=8&t=1959 But its still not 100 clear. So for now my work on the 3D printer is focused pretty tightly on getting S3D to do mutli tool prints consistently and generate the G Code properly. No actual printing right now, its more having S3D kick out GCode then me digging through it to find the problems.


Leave a Reply