
After a flurry of changes, tweaks, repairs (yup), and final wiring of the right extruder… She lives. Below are the pics of the final wired extruders.

First print height test 
Left Extruder 


Right extruder 
Calibrating the machine 

The wiring mess , this is all temporary, this will be all cleaned up. 
Corner brackets printed to hold the Ultrabase plate
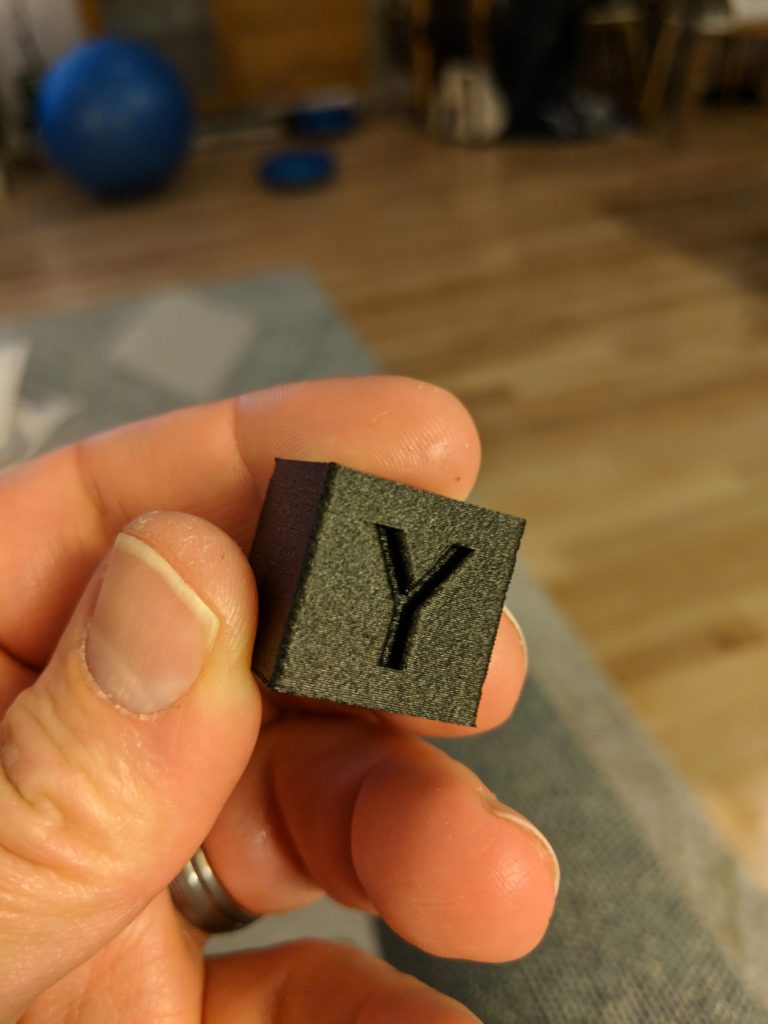
Overall the printer is working awesome and better than I thought it would for the first tries. I had to learn a ton about Duet RepRap coding, and then had to build new S3D profiles. First material I printed with was NylonX ( go big right?) Since I had it out and in the drybox already… Once I tweaked the Z offset it printed every bit as good as I could have hoped. I still need to work with the Acceleration and Jerk profiles on the printer, but here is the result:
Here is a video of the first print.
Now… what does not work? – The U Axis/ right extruder.
I have the code setup right from what I can see… but the U Axis doesnt seem to print right… It will heat up, extrude material, but the Left extruder is the one that will do the movements. Which is pretty comical, but frustrating. I am unsure if this is a Duet or a Simplify 3D code issue right now. I reviewed the print GCode and see the tool change commands in it, but it seems the Duet is not recognising it. So I’ve posted in the Duet forum asking for more info on that.
Next construction on the printer is going to the local glass shop to get some polycarbonate cut for the back and electronics. The back panel is important as it is the support for the internal dry boxes that will be mounted in the printer. And the base plate is important so I can clean up and finalize the wiring. Also so I can move the printer easier 🙂